
概要
GCP の GCE インスタンスにアクセスできなくなった。
環境
- GCE e2-small
- CentOS7
現象
コンソールからも ssh アクセスできない
コンソールから ssh アクセスできない。
コンソール上ではインスタンは起動している状態。
停止→開始を行っても変化なし。
シリアルコンソールを確認
こういうときはシリアルコンソールを確認する。
確認手順
- 対象インスンタンスを選択

- 「シリアルポート 1 (コンソール)」を選択
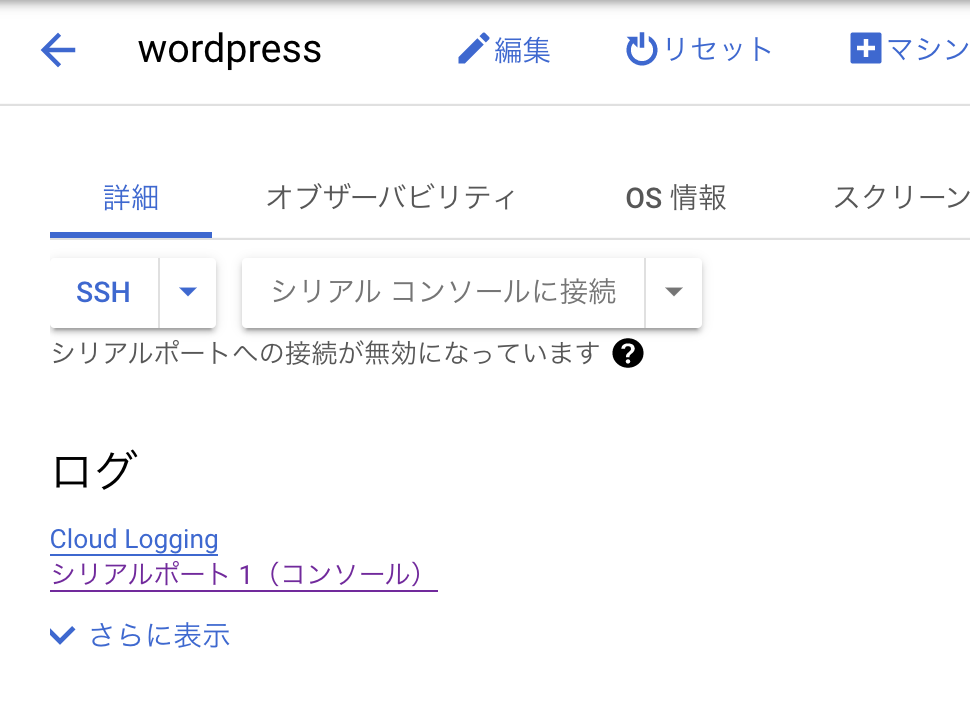
- カーネルパニックが発生していることを確認

Kernel panic – not syncing: VFS: Unable to mount root fs on unknown-block(0,0)
[    2.085311] No filesystem could mount root, tried:
[    2.086372] Kernel panic - not syncing: VFS: Unable to mount root fs on unknown-block(0,0)
[    2.087610] CPU: 0 PID: 1 Comm: swapper/0 Tainted: G               ------------ T 3.10.0-1160.53.1.el7.x86_64 #1
[    2.090179] Hardware name: Google Google Compute Engine/Google Compute Engine, BIOS Google 01/01/2011
「VFS: Unable to mount root fs on unknown-block(0,0)」なので、マウントされたディスクに問題がある?
今回は yum update 後に起こってしまったため、カーネルのバージョンを1個前に戻す必要がある。
対応
該当インスタンスを停止
アクセスできなくなった GCE インスタンスを停止する。
スナップショット作成
アクセスできないインスタンのスナップショットを作成する。

スナップショットから救助用ディスク作成
resucue-disk と名付けた救助用ディスクを作成する。
上記で作成したスナップショットをソースとする。

別インスタン(救助用)を作成
インスタンスを作成 → ブートディスク → 同じ OS を指定
救助用ディスクをアタッチ
アタッチ前がこちら。

停止中の該当インスタンスを選択し「編集」→「既存のディスクを接続」。


GCP コンソール上でアタッチされていることを確認。

ssh コンソール上から /dev/sdb が追加されたことを確認。
fdisk -l
WARNING: fdisk GPT support is currently new, and therefore in an experimental phase. Use at your own discretion.

Disk /dev/sdb: 32.2 GB, 32212254720 bytes, 62914560 sectors
Units = sectors of 1 * 512 = 512 bytes
Sector size (logical/physical): 512 bytes / 4096 bytes
I/O size (minimum/optimal): 4096 bytes / 4096 bytes
Disk label type: gpt
Disk identifier: 3A6E3AAE-3FD4-4285-9617-FA32808F648A


#         Start          End    Size  Type            Name
 1         2048       411647    200M  EFI System      EFI System Partition
 2       411648     62912607   29.8G  Microsoft basic
WARNING: fdisk GPT support is currently new, and therefore in an experimental phase. Use at your own discretion.

Disk /dev/sda: 32.2 GB, 32212254720 bytes, 62914560 sectors
Units = sectors of 1 * 512 = 512 bytes
Sector size (logical/physical): 512 bytes / 4096 bytes
I/O size (minimum/optimal): 4096 bytes / 4096 bytes
Disk label type: gpt
Disk identifier: 6DEC12CB-4836-479C-8AE4-8332371DF027


#         Start          End    Size  Type            Name
 1         2048       411647    200M  EFI System      EFI System Partition
 2       411648     62912607   29.8G  Microsoft basic
/dev/sdb はまだ認識されていない。

/dev/sdb をマウントする。
- /dev/sdb1 が boot パーティション
- /dev/sdb2 が LVM
mkdir /data_disk
mount -o nouuid /dev/sdb2 /data_disk
認識した。

確認できた。

この時点で、必要なファイルをバックアップして終わりでも大丈夫。
※後ほど /dev/sdb1 もマウントすることになる
カーネルを修復 ( GRUB2 )
最新の Kernel で不具合が起きているため、古い Kernel を利用するよう指定する。
Kernel の起動順序は GRUB で設定される。今回は CentOS7 なので GRUB2 を設定していく。
マウントした /data_disk をルートディレクトリにする。
for m in dev proc run sys; do mount -o bind {,/data_disk}/$m; done
chroot /data_disk
kernel 一覧を確認。0番目が最も新しく不具合が出たため、 1 番目を指定する。
% awk -F\' '$1=="menuentry " {print $2}' /boot/grub2/grub.cfg
CentOS Linux (3.10.0-1160.53.1.el7.x86_64) 7 (Core)
CentOS Linux (3.10.0-1160.49.1.el7.x86_64) 7 (Core)
CentOS Linux (3.10.0-1160.45.1.el7.x86_64) 7 (Core)
デフォルト起動させる kernel を修正する。初期値は GRUB_DEFAULT=sved となっていたので 1 に変更。
vi /etc/default/grub
---
GRUB_DEFAULT=1
---
/boot/grub2/grub.cfgファイルを再作成。
grub2-mkconfig -o /boot/grub2/grub.cfg
起動する kernel を指定。ただ、下記のコマンドは失敗した。
grub2-set-default 1
# grub2-set-default 1
/usr/bin/grub2-editenv: error: cannot rename the file /boot/grub2/grubenv.new to /boot/grub2/grubenv: No such file or directory.
/usr/bin/grub2-editenv: error: cannot rename the file /boot/grub2/grubenv.new to /boot/grub2/grubenv: No such file or directory.
/usr/bin/grub2-editenv: error: cannot rename the file /boot/grub2/grubenv.new to /boot/grub2/grubenv: No such file or directory.
grubenv がないため。正確には、grubenv の実態が存在する /dev/sdb1 がアタッチされていないため。
# ls -la /boot/grub2/
total 16
drwx------. 2 root root   56 Jan 25 05:56 .
dr-xr-xr-x. 5 root root 4096 Jan 23 09:36 ..
-rw-r--r--. 1 root root 6104 Jan 25 05:56 grub.cfg
lrwxrwxrwx. 1 root root   25 Nov  5 05:34 grubenv -> ../efi/EFI/centos/grubenv
-rw-r--r--. 1 root root 1024 Jan 25 05:57 grubenv.new
boot 配下に grubenv がないことを確認。
# ls -la /boot/efi/
total 4
drwxr-xr-x. 2 root root    6 Nov  5 05:31 .
dr-xr-xr-x. 5 root root 4096 Jan 23 09:36 ..
/dev/sdb1 をマウントする。
mount /dev/sdb1 /data_disk/boot/efi/
マウントできたことを確認。
# ls -la boot/efi/EFI/centos/
total 7028
drwxr-xr-x. 3 root root    4096 Jan 23 09:36 .
drwxr-xr-x. 4 root root    4096 Nov  5 05:34 ..
-rwxr-xr-x. 1 root root     134 Aug  1  2020 BOOT.CSV
-rwxr-xr-x. 1 root root     134 Aug  1  2020 BOOTX64.CSV
drwxr-xr-x. 2 root root    4096 Nov  5 05:34 fonts
-rwxr-xr-x. 1 root root    6360 Jan 23 09:36 grub.cfg
-rwxr-xr-x. 1 root root    1024 Jan 23 09:36 grubenv
-rwxr-xr-x. 1 root root 1122120 Oct 14 09:12 grubx64.efi
-rwxr-xr-x. 1 root root 1154640 Aug  1  2020 mmx64.efi
-rwxr-xr-x. 1 root root 1154640 Aug  1  2020 MokManager.efi
-rwxr-xr-x. 1 root root 1243864 Aug  1  2020 shim.efi
-rwxr-xr-x. 1 root root 1237824 Aug  1  2020 shimx64-centos.efi
-rwxr-xr-x. 1 root root 1243864 Aug  1  2020 shimx64.efi
grub2 系のコマンドが利用できた。
# grub2-editenv list
saved_entry=CentOS Linux (3.10.0-1160.53.1.el7.x86_64) 7 (Core)
1 に変更。
# grub2-set-default 1
# grub2-editenv list
saved_entry=1
このディスクをデタッチ後、別インスタンスのブートディスクに設定し、ssh でログインできることを確認できた。
後片付け
ダメな kernel は再インストール。
yum reinstall kernel-3.10.0-1160.53.1.el7.x86_64
GRUB は勝手に更新された。
# grub2-editenv list
saved_entry=CentOS Linux (3.10.0-1160.53.1.el7.x86_64) 7 (Core)
再起動。
reboot
諸々の設定は戻して、不要なリソースは削除しておくこと。
参考
Kernel Panic on CentOS – Google Compute Engine Instance
[Kernel panic] VFS: Unable to mount root fs on unknown-block(0,0) の対処方法
Amazon EC2 インスタンスが更新によって正常に再起動しなくなった後で、既知の安定したカーネルに戻すにはどうすればよいですか?

コメント